Wednesday, May 25, 2011

Sounds for Modern Worship - The Rhodes & Wurli

As a worship leader that leads from the keyboard, I am constantly getting asked what type of sounds I use when I lead worship. The answer is...well...a lot of different things. Piano has always been my first love, but I am also drawn to synthesizers and other keyboard instruments as well because I can create new sounds or re-create a familiar sound in a unique way. If you've been struggling to move beyond playing just the piano, this series of articles is for you. My goal is to talk about some commonly used sounds in modern worship and when to use them.

Today we'll be taking a closer look at the sound of a Rhodes and Wurli. These have become some of my favorite sounds to play! In fact, I probably play them as much as I play piano. What's great about these instruments is many times they can be played instead of piano and will add a very different character to the song.

The Rhodes
The Rhodes has a bell type of tone with lots of body. If you add some effects such as delay or tremolo you can create a more spacious sound that can really fill in a mix. You hear it used a lot in the Hillsong United and Jesus Culture albums. A great example of a Rhodes sound is in the intro of the song "Forever Reign" from Hillsong's Beautiful Exchange Live album (video below). The sound is pretty much a straight Rhodes with some delay for effect. Another example is in the song "Revelation Song" on the Consumed album by Jesus Culture where you can hear it throughout the verses.


Another cool thing about the Rhodes is that the original instrument uses pickups similar to an electric guitar, which means you can make some great "electric guitar" sounds with a little creativity. To accomplish this, just run the Rhodes through a simulated guitar amp and crank up the gain until it starts to sound distorted. Then apply EQ, delay and reverb to taste and you have a killer electric guitar-ish sound! When playing a sound like this you want to make sure that you approach it like a guitar player and not a piano player. It's really a lead instrument so you won't be playing chords but more individual notes and if you use a lot of delay (like I do) then you can play even less and have a HUGE sound.

The Wurli (Wurlitzer)
A Wurli (or Wurlitzer) is typically classified in the same category as a Rhodes but it has a much sharper attack and less body and almost always has some tremolo applied to it. A great example of this sound is in the verses of "Rain Down" by Delirious on their album Now Is The Time: Live At Willow Creek (video below).


I use it a lot as an alternative to clean guitar parts if I only have one guitar player and want the sound of a second by modifying my playing to try and match the notes of the guitar riff. If you try this you really have to think about the correct inversions a guitar player would use because it will have a huge impact on whether it sounds right or not. It's also great as a replacement for piano as it's a very percussive instrument and cuts through a mix well.

Hopefully this got your creative juices flowing and in the next few articles I'll be covering Organ, Synth Lead, and Synth Pad. If there's another type of sound you'd like me to cover feel free to post it in the comments.

Related Posts
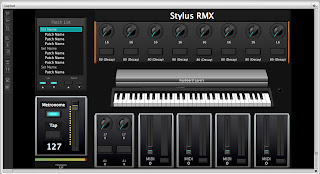
Changing the Time Signature of Loops In Stylus RMX
So You Want To Use Your Computer Live
3 Simple Ways to Optimize Your Computer

Thursday, May 19, 2011

3 Simple Ways To Optimize Your Computer For Live Performance

If you did a google search on this subject you would find more information than you would know what to do with. The goal of this article is to help you get the most performance out of your computer without needing to be a computer genius.

Nothing here involves adding more RAM or installing a faster hard drive, though those things will help immensely, but rather I'll provide some simples tweaks that should give you overall better performance. I will cover both Mac's and PC's so if you read this and know of a great trick I didn't cover feel free to leave a comment with your suggestion. Alright, let's get to it!

1. Turn Off Programs That Run In The Background

Often times this is the number one thing that makes your computer run slow even if you aren't trying to use it in a live situation. Lots of programs, when installed, will make it so that they start running when you boot your computer. Pretty soon you have tons of little programs (and some that aren't so little) all running at the same time using processing power and ram which are a high commodity for audio applications.

Anti-Virus Software (PC)
If you are on a PC the biggest culprit is anti-virus and spyware software which is constantly scanning your hard drive and uses a huge amount of resources. Typically there will be an icon in the toolbar in the lower right hand of your screen. Right click on it and select disable. If it gives you a warning that your computer will be at risk just select ok as you won't be surfing the web or checking email while you perform (at least I hope not). If you press Ctrl+Alt+Del on your PC it will bring up the Task Manager window which will show you all the programs that are currently running. This is a useful tool in helping you know what programs are actually running and you can close them right from there.

Time Machine (Mac)
On the Mac side no one uses anti-virus software but that doesn't mean you don't have programs running in the background. If you use Time Machine to keep your computer backed up (which is always recommended by the way) it is constantly scanning your drive for any changes that might occur. This is great but again, you aren't going to be performing a backup during a live performance so it's best to turn it off until you want to backup your computer again.

Dashboard (Mac)
If you happen to use Dashboard a lot and run lots of programs this can also have an impact on your performance. I never even use it so I just closed all running applications in Dashboard so it doesn't eat up any resources. Also look up in the top toolbar for any program icons that may be running and right click on any you don't deem necessary for audio such as Dropbox and turn them off. If you press Command+Space Bar and type Activity Monitor, you can open the program which is just like the Task Manager for Windows and it will show you all programs that are running and how much of your resources they are consuming.

Disable Non-Essentials (Mac & PC)
Last but not least you should disable your Wi-Fi and Bluetooth. They're just another thing using up valuable resources that could be dedicated to your audio application.

2. Close All Applications You Aren't Using

This seems like a duh statement but really it's not. Mac users are usually the worst offenders in this category because they often believe that if they closed the window of an application that they closed the program, when in fact they just closed the window. The reason this happens is because in the PC world it typically DOES close the program so a quick way to check for all you Mac uses out there is to hold down the Command key and then press Tab and you'll see icons of all running programs on your computer. Keep pressing tab to select the different programs and then press Q (you should still be holding down the Command key) to close the program that is highlighted. When you're done nothing should be left except the Finder icon, which looks like a square smiley face, because it will always be running.

3. Hard Drive Maintenance

Clean It Up!
Your drive should not be over 80% full. This can be a challenge for people who have all their pictures and music on their laptop so just make sure that if there are things you can backup and get off that drive do it. The less data your computer has to search through to find a file the better. This is also why I recommend installing samples or large audio programs to a secondary hard drive as this will make your computer run much more efficiently. Also, make sure to empty your trash! I can't tell you how many people literally have gigabytes of data just sitting in their deleted file and they just need to empty it.

Defrag Your Drive
Second, if you are on a PC you should Defrag your hard drive. Bits of data that make up a single file can be in several locations on the hard drive making it much slower to read the file so Defrag goes out and re-organizes the bits of data so they are all together. This is something you should do on a regular basis and you should include defraging on any external hard drive you use for audio as well. If you're on a Mac it's a bit different but you should run the program Disk Utility which is located in your Applications > Utilities folder. For the sake of this article it's best described as a similar program to Defrag for Windows. Just select the drive you want and click "Repair Permissions" which will correct any errors it finds.

You're done! Now wasn't that easy? Hopefully that helps your computer move a little faster. If you have other great tips or suggestions on how to improve your computer's performance feel free to leave a comment.

Related Posts:
So You Want To Use Your Computer Live

Monday, May 2, 2011

Customizing Your Design in Mainstage - The Layout Page


Now that you have a pretty good idea what Mainstage looks like in a live setting and what makes up that performance, it's time to take a peak at how you customize the actual layout of what you see on the screen. To make these changes we'll go to the Layout Page and look at what you have to work with.

Layout Section
This section is what takes up most of the screen and EVERYTHING in it can be moved, resized, deleted, re-named, etc. to be customized to the way you want to use Mainstage.  The possibilities are endless and are only limited by your imagination. 
You can create a guitar rig with different amps and effects, you can add a looper, you can have lyrics, level meters, and on and on. What I have found in creating a layout is I usually mimic a combination of my controller layout and the way the software synths work within it's own interface. In the screenshot of my most recent layout you can see that I have setup things that I trigger  live and need to have visual reference of. Here's a list of what I have created in my layout screen:

  • List of keyboard patches
  • On & Off, volume control, and current tempo for my click track (metronome)
  • CPU meter so I can monitor my computers performance at all times
  • Stylus RMX Control Pannel - Start/Stop 8 drum loops with independent volume controls
  • Keyboard with layers
  • Effects module - Reverb & Delay with independent wet/dry and mute controls (next to metronome)
  • Volume control, mute, and level meters for 4 separate outputs on my audio interface


Pads, buttons, and sliders on my MIDI controller have been assigned to everything on the screen so I can have complete control in a live situation without needing to touch the laptop. Which brings me to the Screen Control Inspector which makes it easy to assign the knobs and buttons you put on the screen to your MIDI controller whether it's a keyboard or foot controller.

Screen Control Inspector
This is the section where you can easily assign your screen controls to a physical controller. The easiest way to do this is to click the on screen control you want to assign to your controller, click the "Learn" button, and then move the knob or press the button you want to assign to it. You'll see it grab or light up and your that's it! Now all you have to do is just select the next on screen control and it will stay in "Learn" mode so you can quickly assign all of your controls. You can also set the color and label of the control as well as have access to in-depth editing to the MIDI channel, number, type, etc.

Screen Control Palette
Essentially this is where all the different types of controls Mainstage uses can be pulled from to add to your layout. All you have to do is drag and drop the control of your choice to your layout. If you see a number by a control it tells you it's a group so when you drag it to the layout screen it will create that many identical controls for you at once.

You can also create your own grouped controls. For example I created a group that included a level meter, volume control, and mute button so anytime I want an easy way to control and monitor an output on my audio interface I just drag the group to my layout and assign it accordingly. This can really save you tons of time when designing other layouts our when you're trying to re-work an existing one. I enlarged the section and took a screen shot so that you can see more of the controls that are available in this section.


Hopefully this helped you understand just how flexible and creative this program can be and how it can be used for many different things not just keyboards! In fact, Mainstage comes with several templates for Vocals, Guitars, and Audio Mixers to help jump start your creative juices.