Showing posts with label Mainstage. Show all posts

Sunday, June 19, 2011

Create A Click Track In Mainstage

My Click Track Controls
Using click tracks have started to become a standard practice for many worship teams as it can really tighten up your timing and make it much easier to integrate loops and timed effects. What's great about using the internal metronome in Mainstage is that it will automatically change to the tempo you set for each patch. It can also be routed to alternate outputs so you can send it to your team's in-ear monitors without sending it to the main mix. Here is a quick and easy setup guide.

Step 1 - Create An On-Screen Control
Go to Layout Mode and create a button on your screen and then assign it to a button on your MIDI controller so that you can trigger your click track live. I have integrated my on-screen click button with the Tempo info and MIDI message light so I can see all related info in one easy place.

Step 2 - Assign Your Control To The Metronome
Go back to Edit Mode and click on the concert level. This is important because you want the click to work on all patches inside the concert. Once you're there, click on the button you created and go down to the Screen Control Inspector and select Actions > Metronome. You can now press the button on screen or the assigned MIDI controller button and you should hear the click start and stop.

Step 3 - Assign The Metronome To Alternate Outputs
If you have an audio interface with multiple outputs you can easily assign it to a different set of outputs to be fed to your team's in-ears. Go to Mainstage > Preferences, go to the Metronome section and select the Output drop down menu and select the outputs you want to send the metronome to.


Saturday, June 4, 2011

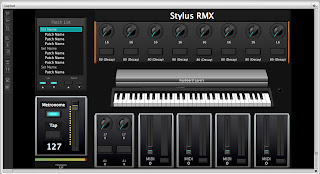
Setting Up Stylus RMX In Mainstage - Step 2

Now that you know how to create a channel for Stylus RMX I move on to showing you how to create on screen controls. I walk you through how to create buttons to start and stop the loops, independent loop volume controls, and how to assign them to your MIDI controller so that you don't have to reach over to your computer to control the software. Enjoy!


Coming soon in my third and final video I will teach you how to assign the on screen controls you created to the Stylus RMX plugin. This is the last step to making your setup with Stylus RMX in Mainstage complete!


Related Posts

Wednesday, June 1, 2011

Setting Up Stylus RMX In Mainstage - Step 1

Per a commenter's request I have started working on a video series that shows you how to setup Stylus RMX in Mainstage. In Step 1 I walk you through setting up a software channel to load Stylus RMX into, where to load it, and how to get it setup to make sound out of your interface. In the next video (coming soon) I'll show you the second step which is creating on screen controls for Stylus RMX. Enjoy!


This video is best watched in HD or at a higher resolution than just what shows up in this blog post so if you click the video after it starts playing it will open up YouTube and you can watch it in HD.

Related Posts

Monday, May 2, 2011

Customizing Your Design in Mainstage - The Layout Page


Now that you have a pretty good idea what Mainstage looks like in a live setting and what makes up that performance, it's time to take a peak at how you customize the actual layout of what you see on the screen. To make these changes we'll go to the Layout Page and look at what you have to work with.

Layout Section
This section is what takes up most of the screen and EVERYTHING in it can be moved, resized, deleted, re-named, etc. to be customized to the way you want to use Mainstage.  The possibilities are endless and are only limited by your imagination. 
You can create a guitar rig with different amps and effects, you can add a looper, you can have lyrics, level meters, and on and on. What I have found in creating a layout is I usually mimic a combination of my controller layout and the way the software synths work within it's own interface. In the screenshot of my most recent layout you can see that I have setup things that I trigger  live and need to have visual reference of. Here's a list of what I have created in my layout screen:

  • List of keyboard patches
  • On & Off, volume control, and current tempo for my click track (metronome)
  • CPU meter so I can monitor my computers performance at all times
  • Stylus RMX Control Pannel - Start/Stop 8 drum loops with independent volume controls
  • Keyboard with layers
  • Effects module - Reverb & Delay with independent wet/dry and mute controls (next to metronome)
  • Volume control, mute, and level meters for 4 separate outputs on my audio interface


Pads, buttons, and sliders on my MIDI controller have been assigned to everything on the screen so I can have complete control in a live situation without needing to touch the laptop. Which brings me to the Screen Control Inspector which makes it easy to assign the knobs and buttons you put on the screen to your MIDI controller whether it's a keyboard or foot controller.

Screen Control Inspector
This is the section where you can easily assign your screen controls to a physical controller. The easiest way to do this is to click the on screen control you want to assign to your controller, click the "Learn" button, and then move the knob or press the button you want to assign to it. You'll see it grab or light up and your that's it! Now all you have to do is just select the next on screen control and it will stay in "Learn" mode so you can quickly assign all of your controls. You can also set the color and label of the control as well as have access to in-depth editing to the MIDI channel, number, type, etc.

Screen Control Palette
Essentially this is where all the different types of controls Mainstage uses can be pulled from to add to your layout. All you have to do is drag and drop the control of your choice to your layout. If you see a number by a control it tells you it's a group so when you drag it to the layout screen it will create that many identical controls for you at once.

You can also create your own grouped controls. For example I created a group that included a level meter, volume control, and mute button so anytime I want an easy way to control and monitor an output on my audio interface I just drag the group to my layout and assign it accordingly. This can really save you tons of time when designing other layouts our when you're trying to re-work an existing one. I enlarged the section and took a screen shot so that you can see more of the controls that are available in this section.


Hopefully this helped you understand just how flexible and creative this program can be and how it can be used for many different things not just keyboards! In fact, Mainstage comes with several templates for Vocals, Guitars, and Audio Mixers to help jump start your creative juices.

Sunday, April 24, 2011

Behind the Scenes of Mainstage - The Edit Page

Last time I gave you a simple overview of Mainstage by looking at the Performance page and how it can be used in a live setting. In this segment, we will take a look at the Edit page and discuss the different sections and show you how they relate to the Performance page. In future installments I will go deeper into each section and how to accomplish certain tasks but to start we'll do an overview.

Click to enlarge image
The Edit Page
The Edit page is where you will spend a majority of your time loading the sounds you want to use live, assigning controls you see on the screen to control the different software synths, route the audio from the program to the inputs and outputs of your audio interface, and insert effects. You'll also be able to create keyboard layers and splits, monitor your CPU usage, and see how much memory you have used up. In the center of the screen there is a Workspace window which allows you to visually see what Performance mode will look like as you make changes to presets and channels. Now lets take a look at a few of the other windows on the Edit page.


Patch List
In short, this section is where you will organize and name your *presets (patches) to be played. You will notice that in this screen shot there are essentially three things: the concert folder, folders to organize your presets, and then the presets themselves.

*A preset or patch contains all information pertaining to the sound you are playing, including what sound is to be played.

The Concert Folder is the master folder that contains all the presets you'll use for a performance. In addition, when you select the Concert Folder you can assign your screen controls to a MIDI keyboard or other hardware to parameters such as master volume or master effects that you always want to be active no matter what preset you have selected. The idea is to have global control. To give you an example, I run my vocals through Mainstage and I like to have a little reverb and delay on my voice. So I assigned the reverb to one of the sliders on my midi controller and delay to another in the concert folder. Moving the slider on my MIDI controller will give me more or less of either effect on my voice. By doing this in the Concert Folder I can change presets but my reverb and delay don't have to deal with being reloaded each time and it saves on computer resources.

The folders inside the Concert Folder can be used to organize your presets. In the example above they are used to organize presets by type so that you can quickly go to the section that contains a certain sound in that category. This is similar to browsing presets on a regular keyboard. Another use would be to label these folders as song titles instead and then place whatever presets you will be playing for that song inside it. It provides great flexibility to make it work in whatever way you need it to. As for organizing the presets themselves, just drag them around with your mouse until they're right where you want them (this includes folders as well). So where do you change the sounds assigned to the presets you have selected?

Channel Strip
The answer is the Channel Strip! Here you can see all Concert Level channels which are always active no matter the preset and you will see preset specific channels as well. Notice the name of the first channel in the picture to the right. It's labeled Steinway 1 which tells you what type of sound has been assigned to that channel in the preset. Here are a some quick definitions of some of the other parts of the channel strip:

I/O - This is where you can change the sound assigned to the channel as well as tell it what outputs of your audio interface to send the sound to

Inserts - Most often you would place EQ, compression, limiting, or other effects you want to be applied to the sound you have selected. * Don't forget that every time you add an effect it uses CPU resources.

Sends - This lets you send the sound to another channel most often dedicated to effects like reverb and delay just like you see in the picture. The best way to think about it is that you have a reverb that everything runs through but you can control how much of that same reverb is being added to each channel. It's very useful for saving CPU resources so you aren't loading lots of effects on every single preset. There are, however, times when you would want to do this but do so wisely.

A few other things you have are volume control for each channel strip, digital meters so you can see if the signal is clipping (distortion), mute and solo buttons, and panning control.

Patch Inspector


Mainstage comes with TONS of presets with all kinds of sounds from pianos and strings to world instruments like sitars. You will find all of these presets here. Once you have created a software channel strip you can select from any of these presets and it will automatically load all associated effects, sounds, etc. right into the channel. 


You will also notice there is an Attributes tab which allows you to set some important features. The one I use the most is the Tempo preset because I use lots of synth patches and loops that need to lock to the tempo of each song. Here's how it works. If the "Change Tempo To" box is not checked, this preset will retain the tempo from the previous preset. If the box is checked you can tell it exactly what tempo that preset should be and all effects, loops, etc. will lock to that tempo so everything is in sync.

There you have it! Next time I'll cover the Layout Page and cover some of the ways you can customize your Performance page to look and feel how you want it to.

Related Posts:

Thursday, April 21, 2011

An Introduction to Mainstage - The Performance Page

Whether I'm talking with worship pastors, keyboard players, or customers at Guitar Center looking to integrate a computer into their live setup I am almost always asked the following question:

"Can I use a laptop to replace a keyboard like a Yamaha Motif or a Korg Triton?"

Obviously this can lead to a lengthy discussion but the short answer is YES! There are many ways to accomplish this but by far the best and most streamlined way to do this is with Apple's Mainstage. Mainstage is part of the Logic Pro suite which sells for $499.99 and is bundled with everything you need to create a professional product both live and in the recording studio. In all it installs over 50GB of data which includes loops, effects, software synths, and yes Mainstage among other programs! So how can Mainstage turn your laptop into a keyboard? Lets take a look!

A Glance At Performance Mode
Click the image above to see a full sized picture
This is a screen shot of the keyboard template that comes in Mainstage and really helps you visualize how it organizes sounds and can be viewed as a keyboard running on your computer. The column on the left is a list of all the different sounds you can play and in the main section you have a keyboard with controls for the current sound you have selected. When you have a MIDI controller attached to your computer it can play the sounds and you see the on screen keyboard keys light up to tell you it is receiving a signal from your keyboard. Many MIDI controllers have extra knobs, sliders, and pads on them as well which can be easily assigned to control anything you see on the screen. For example there is a Reverb knob on this screen so if you assigned it to a knob on your MIDI controller you could just reach up to your keyboard and adjust the Reverb level for that sound without having to touch the computer! Another example would be to assign a button on your controller to move to the next sound on the list when you press it and assign another button nearby to go back! Mainstage makes is incredibly easy to make these types of assignments which is one reason I enjoy using it so much. I spend less time getting over a learning curve and more time playing music.

This is just a taste of Mainstage so look for my next segment where I'll take a look at the Edit Page and talk about the components that make up what you see on the Performance Page!

Related Posts:
Behind the Scenes of Mainstage - The Edit Page
Customizing Your Design in Mainstage - The Layout Page