Thursday, April 28, 2011
Your Opinion Matters!
It's clear by the number of views my article "So You Want To Use Your Computer Live!" has received that it's a huge topic of interest. There are so many things I could cover so I thought I'd ask you what questions you would like me to answer or related topics you would like me to cover in relation to this topic. Drop me a line and let me know!
Converting Powerpoint Files to ForScore
Here's a quick and easy guide to converting your Powerpoint files to work with ForScore 2!
Step 1: Convert Your PowerPoint files to PDF
If you're using Microsoft Office on a MAC all you have to do is open the file, select "Save As", and then in the drop down menu select PDF! If you're on a PC all you need to do is download a free Print to PDF program and once installed you open the Powerpoint file and then select print. When the print screen comes up change the printer to PDF and hit print. This will save it as a PDF file and you're good to go!
Step 2: Import Your PDF to ForScore
There are a few ways you can do this. The first way is to connect your iPad to your computer and then drag the files into it. Another great way is to use Dropbox (click see my tutorial on setting up Dropbox) which is quick and easy to use.
Step 3: Adjust Your PDF To Fit The Screen
When you see the file loaded into ForScore you'll notice that it does not stretch to fit the screen entirely. To fix this tap the title of the file in the gray bar at the top of the screen and a pop-up window will appear just like the picture below. In the pop-up window you'll see a view of the file as it appears on the screen and right below that is a slider that adjusts your zoom. Use your finder to slide it until you can't see white on the right and left edges. Once you lift your finger you'll notice the file in the background adjusts so you can see if you zoomed the correct amount. When you're happy with it just tap outside of the pop-up window and it will disappear and save the settings to your file. Note that this will apply to all pages in that file not just the first one.


Step 4: Your Done!
Related Posts
Turn Your iPad Into A Music Reader With ForScore
Using Dropbox To Import Files To ForScore
Foottime Page Turner for iPad
The Gigeasy Mounting System for iPad
Wednesday, April 27, 2011
Using Dropbox To Import Files to ForScore
There are several ways to get your files from your computer to your iPad but what's the best way? The answer can depend on your workflow or just personal opinion but using Dropbox has several advantages and is very easy to do.
What is Dropbox?
Dropbox is a cloud based service that allows you to store your files on the internet so that you can have access to them anywhere and on several devices such as your iPad or iPhone. The free version gives you 2GBs of storage, which for our purposes is more than plenty, but you can get up to 8GBs free by inviting others to join. You can also share folders that you create with other Dropbox users making it easy to share files with one another. Now that you know what Dropbox is, let's look at the steps to getting the files to Dropbox and then to ForScore 2.
Step 1: Go to http://www.dropbox.com and create a free account.
Step 2: Once your logged in, create a folder where you will place all your music to be uploaded to your iPad. You can also download the Dropbox application to your MAC or PC which makes uploading even faster and easier!
Step 3: Upload your PDF files to the folder you created in Dropbox
Step 4: Go to the App Store on your iPad and download the Dropbox App and get logged in.
Step 5: Click on the folder where your music is located and press the Export button in the very top right of the screen. You will see a drop down menu appear showing applications you can open the file in. ForScore should be listed so choose it. (See screen shot below)

Step 6: Your done! Once it opens in ForScore the file is saved in the program.
As you can see this is extremely easy to do. If you have a lot of files ready to go and you want to import them all at once then I would recommend using iTunes since you can drag and drop all the files at one time. The advantage to using Dropbox, however, is that your team can have access to whatever files they need and if someone else creates a new song they just upload it and you just go get it and import it!
Related Posts:
Monday, April 25, 2011
Foottime Page Turner for iPad & iPad 2
Last time I talked about the GigEasy Mounting System which allows you to mount your iPad to a microphone stand. We are one step closer to having a complete music reader solution, in terms of hardware, for the iPad but there's still one thing we're missing. That is some kind of footswitch that allows you to turn the page so you don't have to use your hands. Well, there IS such a thing which leads me to the Foottime Page Turner.
 Foottime Page Turner for iPad & iPad 2
As you can see this is a very simple device that allows you to turn pages forward or backward on your iPad. In order to connect it you will need to purchase Apple's Camera Kit for iPad ($29) which converts their 30pin plug to USB. Once connected the two buttons light up so you know it's on and ready to go! It works with ForScore and MusicReader Apps to name a few but there are others you can find as well in the App Store.
Another feature of this pedal, which at first doesn't seem like one, is that it is wired. This is good because there is no lag time when switching to the next page of your music. There are several other page turning pedals on the market that use bluetooth to wirelessly connect to the iPad. This is cool and works well but there were a few factors that in the end made me go with this unit.
Price - The Foottime Page Turner is only $49 compared to a bluetooth footswitch which puts you in the neighborhood of $149.
Batteries - none required! This is a huge plus in a live situation because I don't have to worry about it dying on me in the middle of a song or remind myself to constantly charge the unit.
Build - It uses a metal base with rubber feet, tough plastic housing, and backlight buttons so I know that it's powered up and I can see it in the dark.
Plug & Play - Just plug it in and it works!
If you want to read more about the Foottime Page Turner go to http://www.bilila.com/page_turner__ipad
Related Posts
The Gigeasy Mounting System for iPad
Turn Your iPad Into A Sheet Music Viewer With ForScore
Using Dropbox To Import Files Into ForScore
Convert Powerpoint Files To ForScore
The GigEasy Mounting System for iPad & iPad 2
Now that the iPad has been around for over a year companies are finally starting to come up with some great accessories that make it easier to use as a music reader. One of the most requested items by far is a product that allows you to mount your iPad to a stand. As soon as I purchased my iPad 2 I went into research mode to see what was out there and found a great product you should be aware of.

The GigEasy Mounting System for iPad
If you're like me you chose to use your iPad as a music reader to save space on stage as well as store all your songs in one place. After looking at all my options this was the iPad mount I decided to go with because of it's high quality build and the mounting system worked well with my existing setup.
As you can see in the picture to the right, it's very sleek and can mount onto any microphone stand. It uses spring loaded arms to grab each corner of your iPad which holds it firmly in place and makes it easy to take in and out of the mount. If you want to use the iPad in landscape mode all you have to do is turn it! It has notches that lock in into either view so it's really easy to change on the fly.
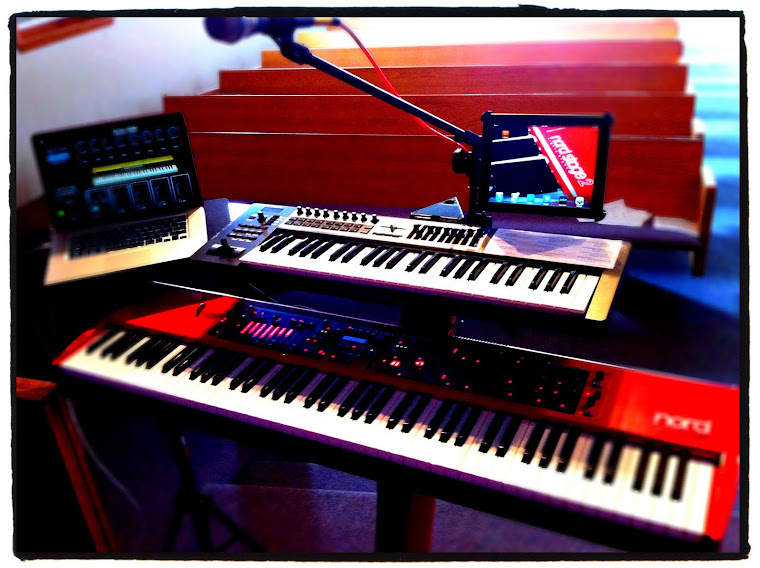
If you are looking to mount it to a mic stand that you are also using to sing into then all you have to do is purchase the extension arm. The arm attaches around the mic stand itself and has a threaded mount on the other end for the GigEasy to attach. This gives the GigEasy a lot of flexibility for different scenarios you might encounter. If you look at the pictures on My Keyboard Rig page you'll see that I actually mounted it directly to my keyboard stand. Since I have a mic boom attachment that mounts to my keyboard stand I am able to attach the extension arm to the boom and have my iPad appear as if it's floating in the air above my keyboards!
This GigEasy mount is $89.99 or $99.99 with the extension arm. It's not the cheapest mount on the market but due to it's quality build and versatility it's worth every penny.
Sunday, April 24, 2011
Behind the Scenes of Mainstage - The Edit Page
Last time I gave you a simple overview of Mainstage by looking at the Performance page and how it can be used in a live setting. In this segment, we will take a look at the Edit page and discuss the different sections and show you how they relate to the Performance page. In future installments I will go deeper into each section and how to accomplish certain tasks but to start we'll do an overview.
 |
| Click to enlarge image |
The Edit Page
The Edit page is where you will spend a majority of your time loading the sounds you want to use live, assigning controls you see on the screen to control the different software synths, route the audio from the program to the inputs and outputs of your audio interface, and insert effects. You'll also be able to create keyboard layers and splits, monitor your CPU usage, and see how much memory you have used up. In the center of the screen there is a Workspace window which allows you to visually see what Performance mode will look like as you make changes to presets and channels. Now lets take a look at a few of the other windows on the Edit page.
 Patch List
In short, this section is where you will organize and name your *presets (patches) to be played. You will notice that in this screen shot there are essentially three things: the concert folder, folders to organize your presets, and then the presets themselves.
*A preset or patch contains all information pertaining to the sound you are playing, including what sound is to be played.
The Concert Folder is the master folder that contains all the presets you'll use for a performance. In addition, when you select the Concert Folder you can assign your screen controls to a MIDI keyboard or other hardware to parameters such as master volume or master effects that you always want to be active no matter what preset you have selected. The idea is to have global control. To give you an example, I run my vocals through Mainstage and I like to have a little reverb and delay on my voice. So I assigned the reverb to one of the sliders on my midi controller and delay to another in the concert folder. Moving the slider on my MIDI controller will give me more or less of either effect on my voice. By doing this in the Concert Folder I can change presets but my reverb and delay don't have to deal with being reloaded each time and it saves on computer resources.
The folders inside the Concert Folder can be used to organize your presets. In the example above they are used to organize presets by type so that you can quickly go to the section that contains a certain sound in that category. This is similar to browsing presets on a regular keyboard. Another use would be to label these folders as song titles instead and then place whatever presets you will be playing for that song inside it. It provides great flexibility to make it work in whatever way you need it to. As for organizing the presets themselves, just drag them around with your mouse until they're right where you want them (this includes folders as well). So where do you change the sounds assigned to the presets you have selected?
 Channel Strip
The answer is the Channel Strip! Here you can see all Concert Level channels which are always active no matter the preset and you will see preset specific channels as well. Notice the name of the first channel in the picture to the right. It's labeled Steinway 1 which tells you what type of sound has been assigned to that channel in the preset. Here are a some quick definitions of some of the other parts of the channel strip:
I/O - This is where you can change the sound assigned to the channel as well as tell it what outputs of your audio interface to send the sound to
Inserts - Most often you would place EQ, compression, limiting, or other effects you want to be applied to the sound you have selected. * Don't forget that every time you add an effect it uses CPU resources.
Sends - This lets you send the sound to another channel most often dedicated to effects like reverb and delay just like you see in the picture. The best way to think about it is that you have a reverb that everything runs through but you can control how much of that same reverb is being added to each channel. It's very useful for saving CPU resources so you aren't loading lots of effects on every single preset. There are, however, times when you would want to do this but do so wisely.
A few other things you have are volume control for each channel strip, digital meters so you can see if the signal is clipping (distortion), mute and solo buttons, and panning control.


The Edit page is where you will spend a majority of your time loading the sounds you want to use live, assigning controls you see on the screen to control the different software synths, route the audio from the program to the inputs and outputs of your audio interface, and insert effects. You'll also be able to create keyboard layers and splits, monitor your CPU usage, and see how much memory you have used up. In the center of the screen there is a Workspace window which allows you to visually see what Performance mode will look like as you make changes to presets and channels. Now lets take a look at a few of the other windows on the Edit page.
In short, this section is where you will organize and name your *presets (patches) to be played. You will notice that in this screen shot there are essentially three things: the concert folder, folders to organize your presets, and then the presets themselves.
*A preset or patch contains all information pertaining to the sound you are playing, including what sound is to be played.
The Concert Folder is the master folder that contains all the presets you'll use for a performance. In addition, when you select the Concert Folder you can assign your screen controls to a MIDI keyboard or other hardware to parameters such as master volume or master effects that you always want to be active no matter what preset you have selected. The idea is to have global control. To give you an example, I run my vocals through Mainstage and I like to have a little reverb and delay on my voice. So I assigned the reverb to one of the sliders on my midi controller and delay to another in the concert folder. Moving the slider on my MIDI controller will give me more or less of either effect on my voice. By doing this in the Concert Folder I can change presets but my reverb and delay don't have to deal with being reloaded each time and it saves on computer resources.
The folders inside the Concert Folder can be used to organize your presets. In the example above they are used to organize presets by type so that you can quickly go to the section that contains a certain sound in that category. This is similar to browsing presets on a regular keyboard. Another use would be to label these folders as song titles instead and then place whatever presets you will be playing for that song inside it. It provides great flexibility to make it work in whatever way you need it to. As for organizing the presets themselves, just drag them around with your mouse until they're right where you want them (this includes folders as well). So where do you change the sounds assigned to the presets you have selected?

The answer is the Channel Strip! Here you can see all Concert Level channels which are always active no matter the preset and you will see preset specific channels as well. Notice the name of the first channel in the picture to the right. It's labeled Steinway 1 which tells you what type of sound has been assigned to that channel in the preset. Here are a some quick definitions of some of the other parts of the channel strip:
I/O - This is where you can change the sound assigned to the channel as well as tell it what outputs of your audio interface to send the sound to
Inserts - Most often you would place EQ, compression, limiting, or other effects you want to be applied to the sound you have selected. * Don't forget that every time you add an effect it uses CPU resources.
Sends - This lets you send the sound to another channel most often dedicated to effects like reverb and delay just like you see in the picture. The best way to think about it is that you have a reverb that everything runs through but you can control how much of that same reverb is being added to each channel. It's very useful for saving CPU resources so you aren't loading lots of effects on every single preset. There are, however, times when you would want to do this but do so wisely.
A few other things you have are volume control for each channel strip, digital meters so you can see if the signal is clipping (distortion), mute and solo buttons, and panning control.
Patch Inspector

Mainstage comes with TONS of presets with all kinds of sounds from pianos and strings to world instruments like sitars. You will find all of these presets here. Once you have created a software channel strip you can select from any of these presets and it will automatically load all associated effects, sounds, etc. right into the channel.

You will also notice there is an Attributes tab which allows you to set some important features. The one I use the most is the Tempo preset because I use lots of synth patches and loops that need to lock to the tempo of each song. Here's how it works. If the "Change Tempo To" box is not checked, this preset will retain the tempo from the previous preset. If the box is checked you can tell it exactly what tempo that preset should be and all effects, loops, etc. will lock to that tempo so everything is in sync.
There you have it! Next time I'll cover the Layout Page and cover some of the ways you can customize your Performance page to look and feel how you want it to.
Related Posts:
Friday, April 22, 2011
Changing the Time Signature of Loops with Stylus RMX
Stylus RMX from Spectrasonics is the best plugin for using and manipulating drum loops in real time! In this video Eric Persing, the creator of all these plugins, shows how Stylus RMX can take any audio loop you have and change it's time signature. This will blow your mind!
Spectrasonics Omnisphere - Psychacoustic Sampling
The software plugin Omnisphere from Spectrasonics is a staple of my keyboard rig. This video shows you what lengths these guys go to to create interesting and unique sounds and can actually be played! Of course the coolest thing they sampled was a burning piano! Check it out!
So You Want To Use Your Computer Live!
With everything getting faster and cheaper these days it's easy to think that if you just dust off that extra computer you have laying around the house then you have what you need to use it in a live application. Let me just say that if you have to dust it off it's unlikely it will be able to perform the way you need it to and even if it can it is only one piece of the puzzle. So the question I want to answer in this segment is:
"What do I need to use my computer live in an audio application?"
The answer is much simpler than you might think but many people tend to overlook at least one of the 4 crucial components: the computer, software, audio interface, and MIDI controller. Let's take a look at each one and explain why it's necessary in creating a great audio computer rig.
 This is obviously the heart of your setup since the entire topic surrounds using a computer live but what kind of computer do you really need? Do I have to have a Mac or will a PC do the job? Does it have to be the fastest computer on the market or will a computer that is a year or two old do the trick? Here are some general rules of thumb to help you know if what you have will hack it or guide you to making a good purchase if your looking for a new computer.
1. The debate between a Mac (Apple) and PC will live on for eternity. I actually enjoy using both platforms but for this type of application I have found Mac's to be much easier to work with. Truthfully the biggest reason is that the software that I use is Mac only so that makes my choice pretty easy. There are lots of PC programs as well and if you have one you love a PC will do the job. We'll leave this topic at that.
2. Generally, computers that are within the last two years most likely will work for this application. They should have enough processing speed, support enough ram, and be able to run the most current operation software platforms so that you can run the software you need to. Some general specs to look for would include a dual core processor, at east 4 GB's of ram, and a 320GB hard drive or larger. I also recommend using an external hard drive to store your samples as this will take a lot of strain off of your internal hard drive and improve your overall performance.
2. Software
 Software is extremely important because it's really what dictates what you can do and how you do it. The computer is just a processor at this point so software can make or break your experience. Since we are talking about a live application I believe Apple's Mainstage is the best at what it does. For the PC side there is a program called Ableton Live (which also runs on a Mac) which is uniquely good at what it does. It's feel is very different from Mainstage however. Other than Ableton many people will use an audio sequencer like ProTools, Cubase, or Sonar to accomplish a similar task. Mainstage by far out shines the other applications for a live performance platform as that is it's specific intent, but people have different workflow preferences and may feel a program like Ableton Live is better suited for the task. Remember it's about you, the user and what you are trying to accomplish.
3. Audio Interface
 This is just a fancy term for external sound card but it is VITAL to making your computer capable of pulling off it's job in a live application. So why do you need one when you already have a sound card built into your computer? There are many reasons why it is necessary:
1. Latency - All computers have what's called latency which basically is the time it takes the computer to process the audio signal passing through it. Built in sound cards are very slow typically. Since you will be using this live you don't want any weird delay because it will make it almost impossible to play a sound or run your vocals through effects. It would be like hitting a note on your keyboard and having it play a second later. Almost all audio interfaces have special drivers (called ASIO drivers) which are super fast and allow you to get the audio through the computer without noticeable delay.
2. Professional Connections - You might need a way to plug your microphone or guitar into your computer so you can use the effects inside it. Depending on the audio interface you choose you will have the ability to plug in multiple things as once as well as feed multiple outputs to different channels on the board or snake. For example I use an M-Audio Profire 610 which has 4 analog inputs and 8 analog outputs. That might sound like overkill at first but it doesn't take long to starting using them. With my setup I use Output 1&2 for my stereo keyboard sounds and I use output 3 for my direct vocal send. There are many more scenarios to could be cover here but trust me when I tell you it's better to have a few extra than not enough!
3. Sound Quality - There is no question that an external audio interface will sound 10 times better than your build in sound card. This stands to reason when you consider the internal sound card probably costs less than $5 to make and is not a core component to your computer, yet a decent audio interface starts at around $99. Hardcore Mac fans will tell you they use their internal sound card with great success but I'm telling you, you don't know what your missing until you get professional sound card. The result is dramatic and it can make the difference between you cutting through the mix and being heard by the audience or get buried in the mix because you lack sonic definition.
 The MIDI controller is a key component because it's the piece of hardware you will be interacting with in a live performance and it brings to life everything else we have talked about. There are lots of options for MIDI controllers these days and most of them have more knobs and buttons then you'll know what to do with until you start seeing the potential and assigning it to your software. I currently use the Edirol PCR-500 49 key controller pictured above and almost every single thing you see on the face of it has a label of some kind. Just to give you an idea of how powerful it is here are some things my controller does for me:
* I can change patches (aka sounds) with the push of a button
* I use one of the sliders to control my master volume
* I use 8 of the drum pads to play and stop different loops I have assigned to them
* I use the 8 knobs above the pads to control the individual loop volumes
* I assigned Tap Tempo to one of the buttons so I can make all loops and effects play in sync with the tempo of whatever song is being played in real time
* I assigned another button as a mute for my keyboard sounds
* I assigned one of the sliders to control how much delay you hear on my voice
The possibilities are endless!
In Summary
As you can see all 4 parts are vital to turning your computer into something that you can perform with. Now that you have a good understanding of what you need you can focus on buying products that fit your work flow and personality so that your rig is your own. Please feel free to post any questions you might have.
"What do I need to use my computer live in an audio application?"
The answer is much simpler than you might think but many people tend to overlook at least one of the 4 crucial components: the computer, software, audio interface, and MIDI controller. Let's take a look at each one and explain why it's necessary in creating a great audio computer rig.
1. The Computer

1. The debate between a Mac (Apple) and PC will live on for eternity. I actually enjoy using both platforms but for this type of application I have found Mac's to be much easier to work with. Truthfully the biggest reason is that the software that I use is Mac only so that makes my choice pretty easy. There are lots of PC programs as well and if you have one you love a PC will do the job. We'll leave this topic at that.
2. Generally, computers that are within the last two years most likely will work for this application. They should have enough processing speed, support enough ram, and be able to run the most current operation software platforms so that you can run the software you need to. Some general specs to look for would include a dual core processor, at east 4 GB's of ram, and a 320GB hard drive or larger. I also recommend using an external hard drive to store your samples as this will take a lot of strain off of your internal hard drive and improve your overall performance.
2. Software

3. Audio Interface

1. Latency - All computers have what's called latency which basically is the time it takes the computer to process the audio signal passing through it. Built in sound cards are very slow typically. Since you will be using this live you don't want any weird delay because it will make it almost impossible to play a sound or run your vocals through effects. It would be like hitting a note on your keyboard and having it play a second later. Almost all audio interfaces have special drivers (called ASIO drivers) which are super fast and allow you to get the audio through the computer without noticeable delay.
2. Professional Connections - You might need a way to plug your microphone or guitar into your computer so you can use the effects inside it. Depending on the audio interface you choose you will have the ability to plug in multiple things as once as well as feed multiple outputs to different channels on the board or snake. For example I use an M-Audio Profire 610 which has 4 analog inputs and 8 analog outputs. That might sound like overkill at first but it doesn't take long to starting using them. With my setup I use Output 1&2 for my stereo keyboard sounds and I use output 3 for my direct vocal send. There are many more scenarios to could be cover here but trust me when I tell you it's better to have a few extra than not enough!
3. Sound Quality - There is no question that an external audio interface will sound 10 times better than your build in sound card. This stands to reason when you consider the internal sound card probably costs less than $5 to make and is not a core component to your computer, yet a decent audio interface starts at around $99. Hardcore Mac fans will tell you they use their internal sound card with great success but I'm telling you, you don't know what your missing until you get professional sound card. The result is dramatic and it can make the difference between you cutting through the mix and being heard by the audience or get buried in the mix because you lack sonic definition.
4. MIDI Controller

* I can change patches (aka sounds) with the push of a button
* I use one of the sliders to control my master volume
* I use 8 of the drum pads to play and stop different loops I have assigned to them
* I use the 8 knobs above the pads to control the individual loop volumes
* I assigned Tap Tempo to one of the buttons so I can make all loops and effects play in sync with the tempo of whatever song is being played in real time
* I assigned another button as a mute for my keyboard sounds
* I assigned one of the sliders to control how much delay you hear on my voice
The possibilities are endless!
In Summary
As you can see all 4 parts are vital to turning your computer into something that you can perform with. Now that you have a good understanding of what you need you can focus on buying products that fit your work flow and personality so that your rig is your own. Please feel free to post any questions you might have.
Thursday, April 21, 2011
An Introduction to Mainstage - The Performance Page
Whether I'm talking with worship pastors, keyboard players, or customers at Guitar Center looking to integrate a computer into their live setup I am almost always asked the following question:
"Can I use a laptop to replace a keyboard like a Yamaha Motif or a Korg Triton?"
Obviously this can lead to a lengthy discussion but the short answer is YES! There are many ways to accomplish this but by far the best and most streamlined way to do this is with Apple's Mainstage. Mainstage is part of the Logic Pro suite which sells for $499.99 and is bundled with everything you need to create a professional product both live and in the recording studio. In all it installs over 50GB of data which includes loops, effects, software synths, and yes Mainstage among other programs! So how can Mainstage turn your laptop into a keyboard? Lets take a look!
A Glance At Performance Mode
 |
| Click the image above to see a full sized picture |
This is a screen shot of the keyboard template that comes in Mainstage and really helps you visualize how it organizes sounds and can be viewed as a keyboard running on your computer. The column on the left is a list of all the different sounds you can play and in the main section you have a keyboard with controls for the current sound you have selected. When you have a MIDI controller attached to your computer it can play the sounds and you see the on screen keyboard keys light up to tell you it is receiving a signal from your keyboard. Many MIDI controllers have extra knobs, sliders, and pads on them as well which can be easily assigned to control anything you see on the screen. For example there is a Reverb knob on this screen so if you assigned it to a knob on your MIDI controller you could just reach up to your keyboard and adjust the Reverb level for that sound without having to touch the computer! Another example would be to assign a button on your controller to move to the next sound on the list when you press it and assign another button nearby to go back! Mainstage makes is incredibly easy to make these types of assignments which is one reason I enjoy using it so much. I spend less time getting over a learning curve and more time playing music.
This is just a taste of Mainstage so look for my next segment where I'll take a look at the Edit Page and talk about the components that make up what you see on the Performance Page!
Related Posts:
Behind the Scenes of Mainstage - The Edit Page
Customizing Your Design in Mainstage - The Layout Page
Related Posts:
Behind the Scenes of Mainstage - The Edit Page
Customizing Your Design in Mainstage - The Layout Page
ForScore App: Turn Your iPad Into A Sheet Music Viewer

I was fed up with using paper for chord charts! It was expensive to constantly print out new lead sheets each week and it was difficult to shuffle the papers around during a live performance. I decided to buy an iPad 2 to use as a music reader so I could get rid of paper once and for all! That part was easy but the hard part was choosing a music reader app! After doing tons of research looking for articles and reviews I struggled to find much useful information. In the end I finally came across an app called ForScore 2.
ForScore 2 is only $4.99 and works with both the iPad and the iPad 2. It's design and layout is elegant and easy to use. The app allows you to create set lists, search for songs easily by title, artist, etc., and supports a footswitch so that you can flip pages without using your hands. Support for Dropbox is built in which makes it much easier to transfer files between your computer and your iPad. It also has Bluetooth sync'ing so if you have friends or your entire band using iPads you can easily send your music directly to them. The last thing really worth mentioning is that the developers are constantly trying to improve their product and are very responsive to feedback and bug fixes. This is very important and I was impressed that they fixed issues I reported in two days!
Later I will post some tutorials on using ForScore 2 but for now go check out the app at http://forscoreapp.com. Download the manual and look it over as it will give you a good feel for the app before you commit to buying it. Enjoy!
Related Posts:
Using Dropbox to Import Files to ForeScore 2
Converting PowerPoint Files for ForeScore 2
Foottime Page Turner for iPad & iPad 2
How to Mount Your iPad to a Mic Stand
Wednesday, April 20, 2011
What would you like to read about?
I have TONS of ideas of topics and content for this blog so I thought I would list a few to get people excited as well as ask you to post topics you might be interested in me addressing. So here are just a few ideas I already have in the works:
1. Finding A Balance with Worship and Technology
2. How to use Mainstage (This will be an entire series including templates you can download)
3. How to turn your iPad into a music reader
4. How to integrate loops into a live worship setting
5. What kinds of sounds should I be using as a keyboard player?
6. Recommended Software Synth Plugins
So tell me what would you like to read about?
Subscribe to:
Posts (Atom)